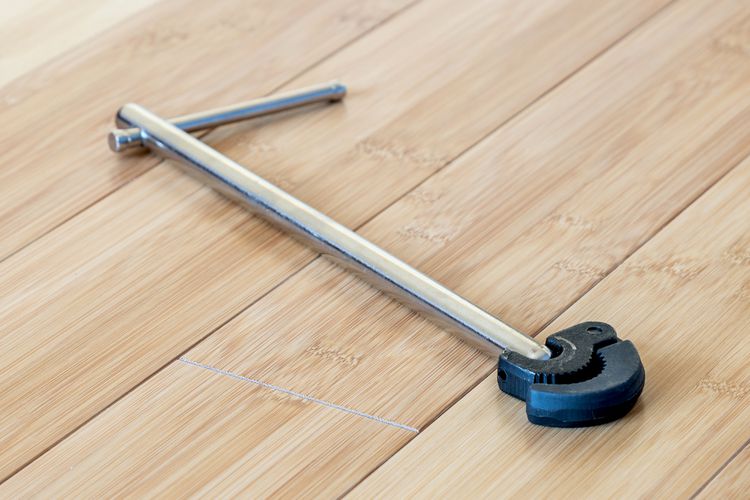
A basin wrench is a specialized plumbing instrument that is a staple for almost every professional plumber and is also a must-have for homeowners who tackle plumbing projects themselves. This tool is specifically crafted for a singular purpose: to install or detach a faucet. However, it excels at this task more effectively than any other tool available. Once you learn to use it, it will become a crucial component of your plumbing toolkit.
Faucets for kitchen and bathroom sinks are usually fastened with low-profile mounting nuts that can only be reached from beneath the sink, behind the basin. In this scenario, conventional wrenches and pliers are nearly ineffective. This is where the basin wrench comes into play.
Contents
What is a basin spanner?
A basin wrench is a specialized plumbing instrument featuring a rotating, self-adjusting gripping head and an extended handle. This tool is designed for tightening and loosening the mounting nuts of faucet tailpieces. Its unique design allows for use in confined areas where other tools may not fit.
Basin Wrench Compared to Channel-Lock Pliers
Numerous DIY enthusiasts often grab long-handled channel-lock pliers, which are also referred to as channel-type or slip-joint pliers, to tighten or loosen the mounting screws on faucet tailpieces.
Channel-lock pliers, thanks to their extended handles, can be useful in tight situations, but they struggle to effectively grasp faucet mounting nuts. For those who have some plumbing experience, particularly intermediate to advanced DIY enthusiasts, it’s advisable to have both a basin wrench and channel-lock pliers in their toolkit.
- Performs a single task, but excels at it.
- Self-regulating gripping mechanism
- The gripping head rotates at a right angle to the handle while in operation.
- A multifunctional instrument that serves various purposes.
- The jaws need to be adjusted by hand.
- The gripping head extends in a straight line from the handles.
Components of a Basin Wrench
A basin wrench features a swiveling gripping head located at the end of a lengthy handle, specifically crafted to access the challenging, hard-to-reach area behind a sink. This tool is ideal for tightening or loosening the mounting nuts of a faucet or the nuts of the flexible supply tubes connected to the faucet tailpieces. Due to the difficulty of accessing these nuts, some plumbers opt to secure the faucet to the sink prior to installing the sink. However, when this is not feasible, the basin wrench allows for easy access from beneath the sink to grip and adjust the mounting nuts.
The device features an elongated handle with a compact, spring-activated claw at the end, which grips the nut as the handle is rotated. The claw can pivot 180 degrees in both directions, allowing for easy adjustment when loosening or tightening nuts. Additionally, a sliding T-bar is located at the base of the handle, offering enhanced leverage for turning.
A basin wrench is specifically intended for working with faucet mounting nuts, which restricts its applications. However, every homeowner eventually encounters the need to replace a faucet, and in those moments, a basin wrench becomes an invaluable tool, making it the best investment of $10 or $20 you could make.
Guide to Utilizing a Basin Wrench
Apply lubricant to the mounting nut (if desired).
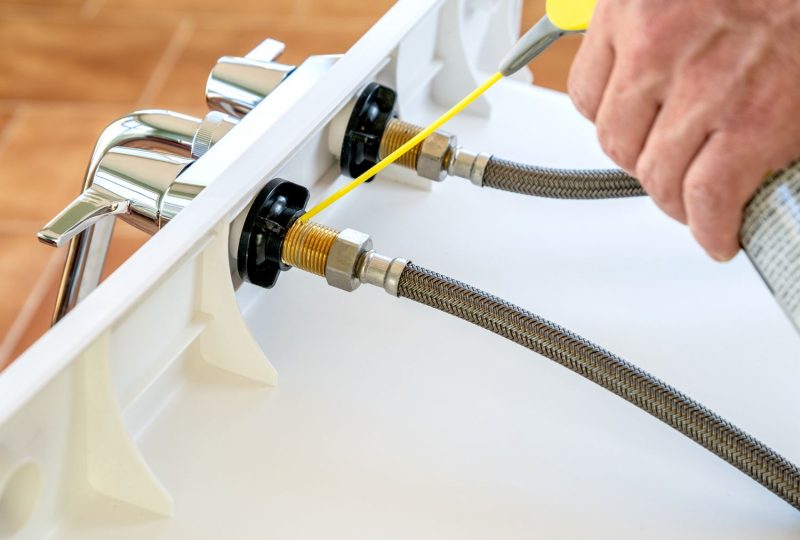
A faucet that has been installed for an extended period might have mounting nuts that are stuck due to corrosion. In such situations, it can be beneficial to apply a penetrating oil beforehand. Using a spray can equipped with an extension straw is perfect for delivering a targeted spray of oil onto the threads of the mounting bolt. Allow a few minutes for the oil to seep in before trying to loosen the nut.
Modify the Wrench Head
- To unscrew the nut, rotate the wrench in the opposite direction of the clock, ensuring that the claw’s opening on the head is positioned to the right.
- To secure the nut, rotate the wrench in a clockwise direction, ensuring that the claw’s opening is positioned to the left.
Keep in mind that rotating in a clockwise direction will tighten, while rotating counterclockwise will loosen. Alternatively, you can think of it as righty-tighty, lefty-loosey. Additionally, remember that you are observing the nut from underneath the sink, looking up, rather than from above looking down.
You can tell that the head is aligned properly when the claw securely holds the nut while you rotate the wrench in the intended direction. If it’s reversed, the claw will easily slide off the nut.
Rotate the Nut
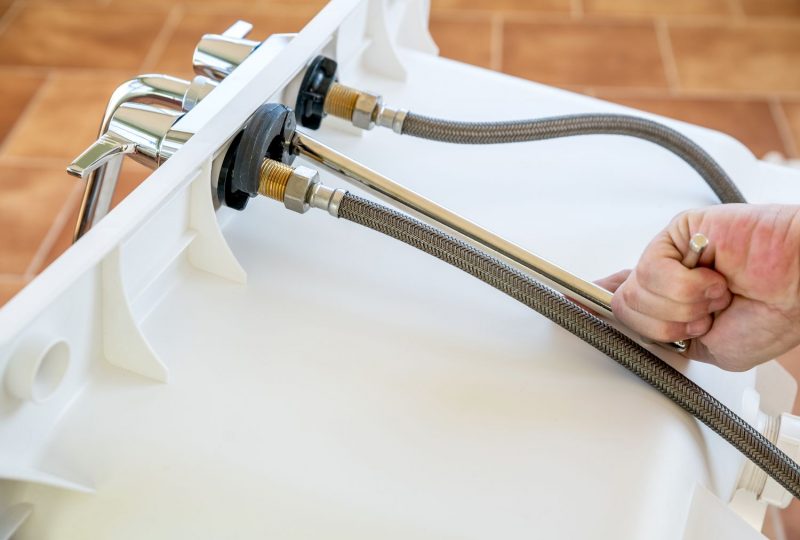
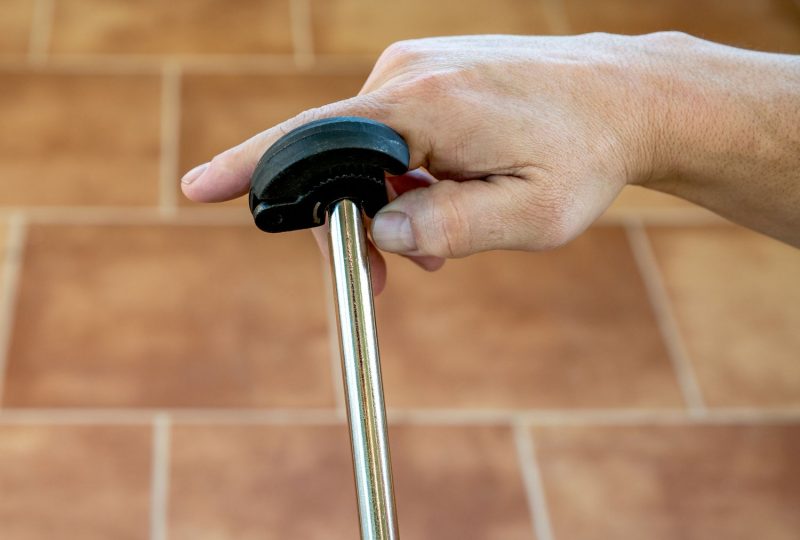
Position the wrench head over the faucet mounting nut, ensuring that the serrated jaws of the claw engage with the notches or edges of the nut. (In the accompanying image, the head is set up for loosening the nut.) Utilize the T-bar located at the end of the basin wrench to rotate the shaft, allowing you to either loosen or tighten the nut. You might need to apply both hands to the T-bar, or you can shift the bar to one side and use one hand to leverage it while keeping the wrench shaft steady with the other hand.
Tip
In certain situations, the nut and shank may be corroded to the point where you need to remove the faucet from the top of the sink. This process can be labor-intensive, involving the use of a reciprocating saw or hacksaw, and demands a considerable amount of skill to avoid causing any harm to the sink or countertop.
Advice for Utilizing a Basin Wrench
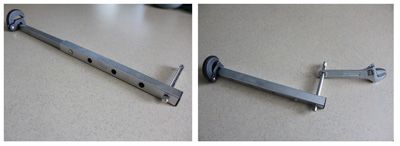
Mastering the use of a basin wrench is a quick process, but here are some helpful suggestions for challenging scenarios:
- A telescoping basin wrench (shown on the left) features an adjustable shaft that allows access to faucets located behind deep sink basins.
- Utilize a pipe or the handle of an adjustable wrench to enhance your leverage on a T-bar (as shown in the right photo) when dealing with difficult nuts. However, such leverage is unnecessary when it comes to tightening a nut.
- The claw is capable of seizing a nut from any angle, similar to how pliers operate, allowing you to adjust the head to a position that feels comfortable for using the wrench.
Leasing versus Purchasing
Although renting a basin wrench from a home improvement store or tool rental service is a theoretical option, it rarely offers any financial benefit. Typically, hand tools are available for rental at a rate of around $10 per day, while a decent basin wrench can be bought for $15 to $20. For those seeking a higher-end, contractor-grade telescoping basin wrench, prices can exceed $50. Even if you plan to use the tool just a few times, purchasing it is usually the more economical choice.
Tips for Keeping Your Basin Wrench in Good Condition
Maintaining a basin wrench is much like caring for any other metal hand tool. After each use, make sure to clean it by wiping it down with a clean cloth. It’s advisable to occasionally apply a light machine oil to the pivot joint. If you notice any signs of corrosion, use a cloth dampened with oil to clean the tool. Ensure it is stored in a dry environment.
With minimal upkeep, you shouldn’t have to purchase a second basin wrench.
