Timothy Thiele holds an associate degree in electronics and is a member of the IBEW Local #176 Union. He brings more than three decades of expertise in wiring for residential, commercial, and industrial projects.
If your light fixture isn’t functioning, the initial step is to verify whether the light bulb has burned out. If the bulb is operational, the solution could be as straightforward as repositioning the bulb socket, or it may require more intricate repairs, such as replacing the entire fixture or the wall switch.
Discover the steps to identify and repair a malfunctioning light fixture.
Contents
Warning
Before repairing the light, ensure that the power to the circuit is completely turned off at the circuit breaker box. Simply switching off the light at the switch may not disconnect the power to the light fixture, and it certainly won’t cut off power to the switch itself.
Ceiling Light Fixture Is Malfunctioning
If a ceiling light fixture that is operated by a wall switch fails to illuminate, adhere to the following troubleshooting steps:
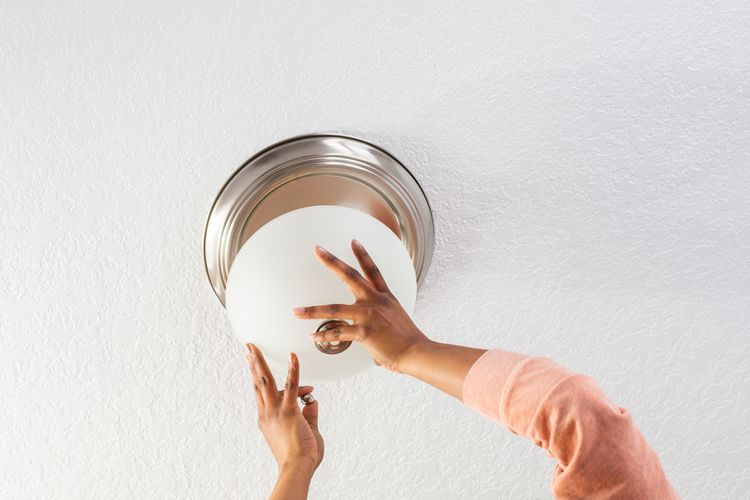
- Inspect the bulb: Ensure that the bulb is securely fastened in the socket. The repeated cycling of electricity can occasionally cause the bulb to become loose. Tightening it should resolve the issue.
- Adjust the metal tab at the bottom center of the socket: Inspect the tab to see if it has flattened. If it has, you might need to gently bend it upwards to ensure it connects properly with the bulb.
- Inspect the switch connections: Ensure the power is off, then take out the light switch to examine the wiring connections.
- Inspect the wiring of the light fixture: With the power still turned off, examine the wire connections at both the light fixture and the breaker panel to ensure they are securely attached.
Ceiling Lamp Intermittently Blinks
If the ceiling light operated by the switch is functioning but the lightbulb is flickering, adhere to the following troubleshooting steps:
- Change the switch: A flickering bulb often indicates that the switch contacts are deteriorating. Typically, you may also notice a sizzling or crackling noise if the contacts are faulty. In such situations, it’s advisable to replace the switch.
- Inspect the wiring connections: It’s possible that the connections are not secure. This issue might occur at the switch, within the circuit breaker panel, or at a junction in the wall or ceiling. The most frequent issue tends to be a loose connection at the switch, given its frequent use.
- Inspect the light bulb socket: Occasionally, the socket for a light bulb can malfunction. If this is the case, consider replacing the ceiling light fixture.
Recessed lighting is malfunctioning.
Recessed canister lights may frequently switch on and off due to various factors. To address this issue, it’s advisable to follow this troubleshooting process:
- Verify the wattage of the bulbs: Ensure that the bulbs installed in the fixture are suitable in wattage. Using bulbs with excessive wattage can lead to overheating of the fixture. Cross-check the wattage of the bulb with the specifications indicated on the fixture. If the bulb’s wattage exceeds the recommended limit, replace it with one that has a lower wattage.
- Reduce the density of attic insulation: When insulation is compressed too closely around the light fixture, it can retain heat around the canister, leading to the limit switch overheating and the light fixture shutting off. Ensure there is adequate airflow around the canister to avoid overheating of the fixture.
- Verify the IC-contact rating: Recessed lighting fixtures that interact with attic insulation should be IC-rated (suitable for insulation contact). Replace any non-IC recessed lights with those that are IC-rated.
- If the limit switch is malfunctioning, it may need to be replaced. Ensure that the light bulb wattage is appropriate and that there is adequate ventilation around the light fixture. If these conditions are met, you might want to think about replacing the limit switch or the light fixture itself.
What is a limit switch?
A limit switch is a safety mechanism designed to automatically switch off a light fixture when the temperature exceeds a safe threshold.
The pull-chain light is not functioning.
Numerous ceiling lights found in utility closets, pantries, or workshops are typically operated using pull chains or switches located on the fixture or socket. To troubleshoot these light fixtures, adhere to the following diagnostic steps:
- Examine the lightbulb: Carefully rotate the bulb to determine if it is improperly seated in the socket or if it has burnt out. Secure the bulb or swap it out if necessary.
- Examine the socket tab: The socket tab can be found at the center of the socket. If it appears to be flattened, it needs to be lifted to ensure it connects with the bulb. Always turn off the power to the circuit before handling any exposed metal parts of the light socket.
- Examine the wires of the fixture: Ensure the power is turned off, then inspect the connections of the switch wires to confirm they are secure. Detach the switch from the circuit and use a continuity tester or ohmmeter to test the connections between the wires.
- Inspect the electrical wire: If any part of the wire connected to the light fixture is exposed, examine the wire closely.
When to Seek Professional Assistance
If you observe any sparks or signs of burning, it’s crucial to contact a licensed electrician right away. Recent renovations to walls or ceilings could have disturbed or damaged electrical wiring. In such cases, the wiring may require replacement.

