Project Summary
- Overall Duration: 10 hours
- Proficiency Level: Novice
- Projected Expense: $2.50 to $3.50 for each square foot.
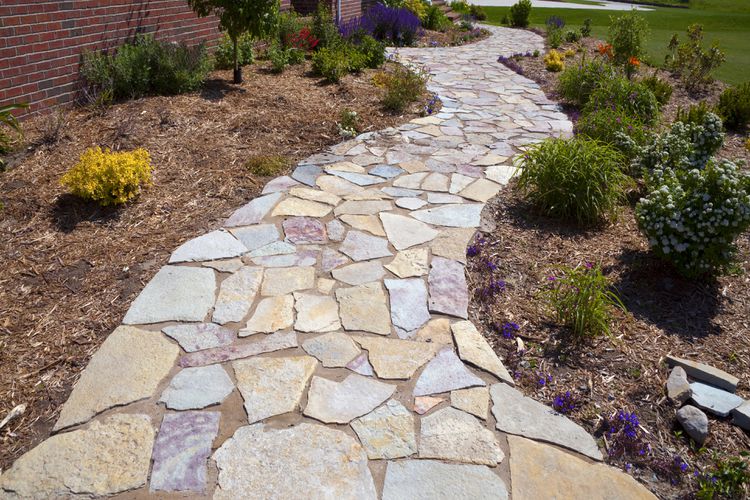
Creating a stone walkway or garden path adds a quaint appeal that perfectly complements a cottage garden aesthetic, yet it can also enhance any natural landscape design. Although stone paths can be set in mortar, this method necessitates a concrete base and a certain level of expertise in stone masonry.
An uncomplicated sandset pathway is significantly easier to create and is ideal for do-it-yourself projects. This method involves placing the stones directly onto a sand base, ensuring their stability and facilitating a level surface. Once completed, the gaps between the stones can be filled with sand, gravel, or even resilient plants that can withstand foot traffic.
Discover a straightforward method for creating a stone pathway, ideal for DIY enthusiasts.
Stone Paved Patios, Pathways, and Barriers

Requirements
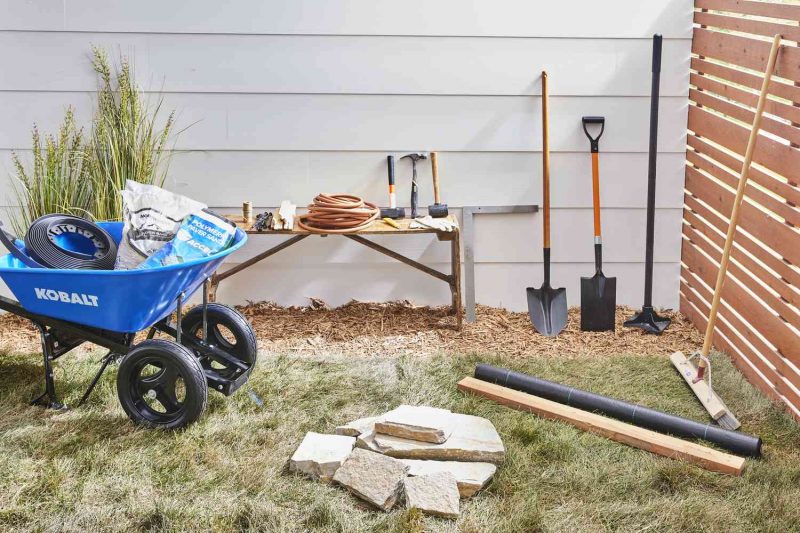
Devices / Instruments
- Posts and a pair of garden hoses.
- Level shovel
- Shovel
- Wheelbarrow
- Manual compaction
- Compact sledgehammer (for use in edging tasks)
- Box cutter
- Reclaimed 2×4 lumber
- Builder’s spirit level
Materials
- Optional edging material
- Garden fabric and anchoring staples
- Gravel (or polymeric gravel, if preferred)
- Expansive, level rocks
- Gravel, soil for potting, and optional plants.
Instructions
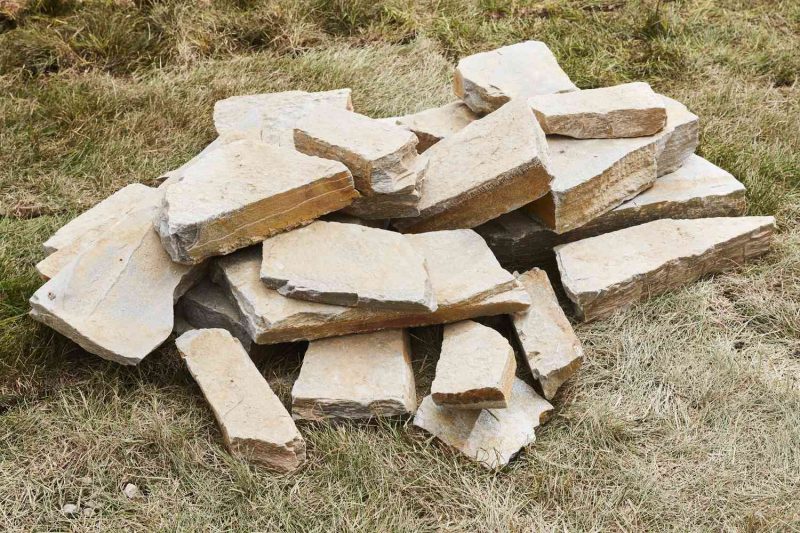
Select Your Gemstone
Selecting stones for a pathway largely depends on personal preference, as any broad, flat stones can be suitable. Flagstone is commonly used for walkways, referring to a stone shape rather than a particular rock type. Opting for a locally sourced stone is often the most economical choice, as it reduces expenses for both the material and transportation. Flagstone with a thickness of 2 to 3 inches is generally considered the most appropriate.
Tip
Ensure that the stone you select has a natural texture and sufficient thickness for durability (avoid using polished stone, as it becomes quite slippery when wet).
Design the Pathway
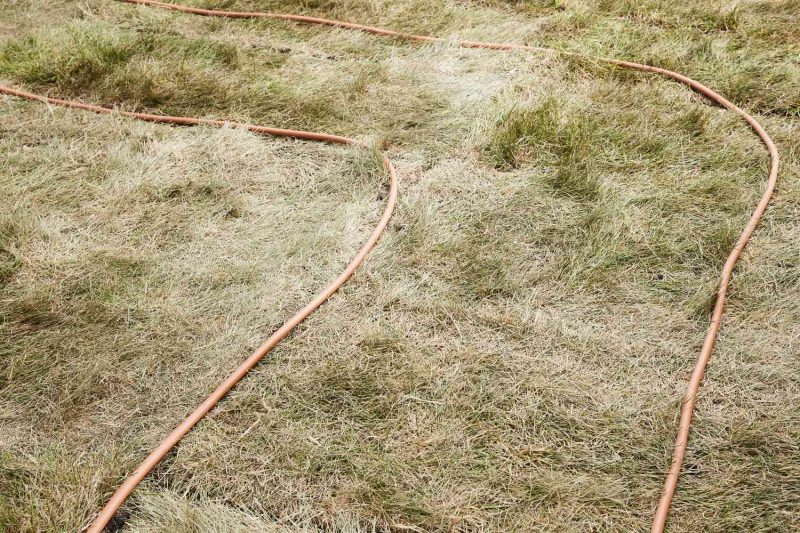
Outline the route of your walkway by utilizing stakes and string for a straight design, or by employing two garden hoses for a more winding layout. If the walkway is intended for regular use, like the route from a driveway to a front entrance, ensure it is sufficiently wide to allow two individuals to walk side by side comfortably. For narrower garden paths or those that lead to secluded areas, a width suitable for a single person is adequate. Position the strings or hoses along both edges of the walkway.
Dig Out the Route

Utilize a flat spade or a sod cutter to cut through the grass along the edges of the pathway, adhering to the lines marked by strings or garden hoses. Clear away all grass and any other plants, ensuring to remove all roots in the designated path area. Excavate the soil to a depth of 5 inches to accommodate 3-inch-thick stones, ensuring a flat and even surface. Compact the soil thoroughly using a hand tamper or by walking over the area multiple times.
Install Border (optional)
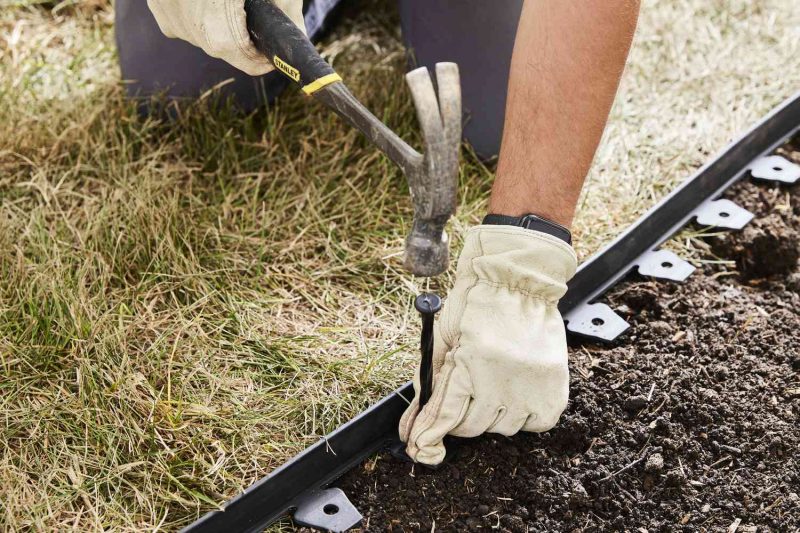
If you wish, you can place edging material on either side of the pathway, adhering to the instructions provided by the manufacturer. There are various options for edging, including galvanized metal, plastic brick paver edging, or pressure-treated wooden timbers. In the absence of edging, the natural boundary of grass or soil next to the path can assist in maintaining the position of the stones.
Install Landscape Fabric
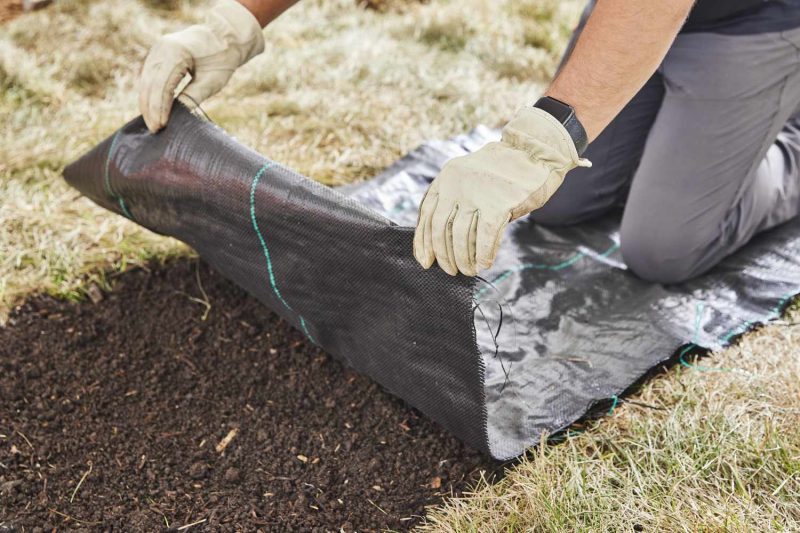
Place landscape fabric over the soil throughout the entire pathway. Aim to utilize a single continuous piece whenever feasible. If you need to employ several sections, ensure that the edges overlap by a minimum of 12 inches. Use a utility knife to trim the fabric to the edges of the path, and fasten it to the soil using landscape fabric staples.
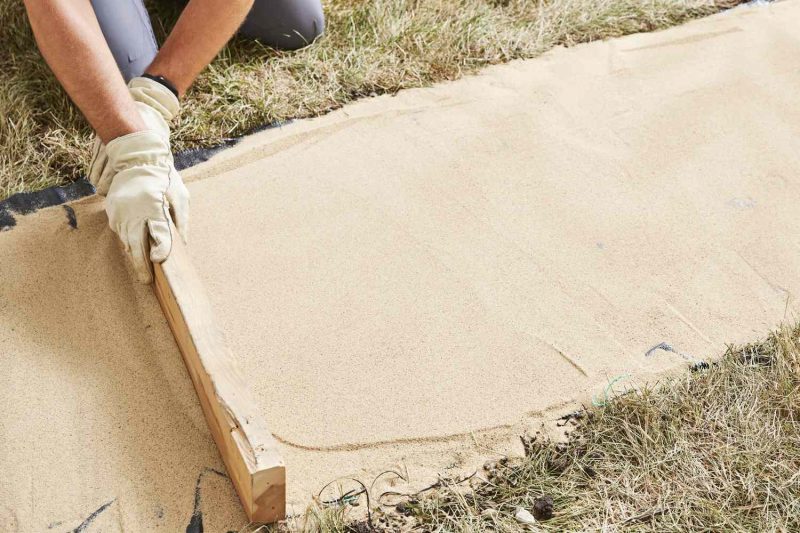
Incorporate a layer of sand.
Place a two-inch layer of sand on top of the landscape fabric. Use a 2×4 board, which should be a bit narrower than the path, to level and smooth the sand, ensuring a flat surface.
Tip
Mist the sand with water to aid in its compaction and concentration before placing the stones.
Arrange the Stones
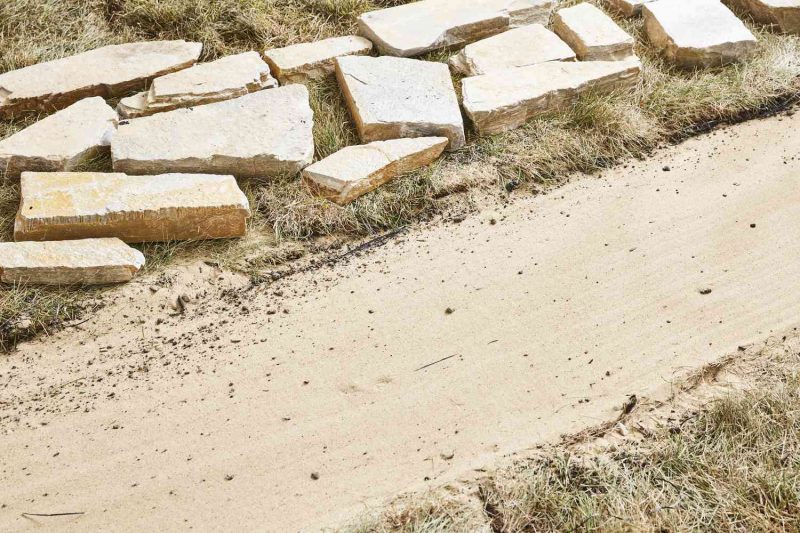
Arrange the path stones to one side of the walkway to ensure they are all clearly visible. This allows you to assess the size and shape of each stone, enabling you to select the most suitable ones as you construct the walkway.
Set up the Stones.
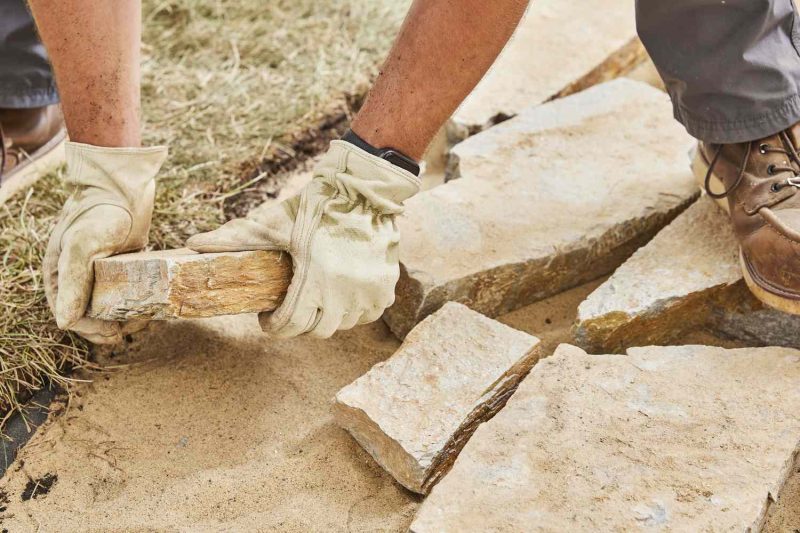
Start by arranging stones in the sand base of the pathway, positioning them according to your preference. If you plan to fill the spaces with sand or gravel, leave small gaps between the stonesfor planting between the stones, leave wider spaces of about 2 inches. Ensure each stone is stable and flush with the adjacent stones. Utilize a carpenter’s level to verify the level of each stone and to ensure alignment with the others as you progress. Adjust the sand beneath each stone to achieve the desired height. Mix larger and smaller stones, as well as various shapes and colors, to create a naturally random appearance.
Complete the Blanks
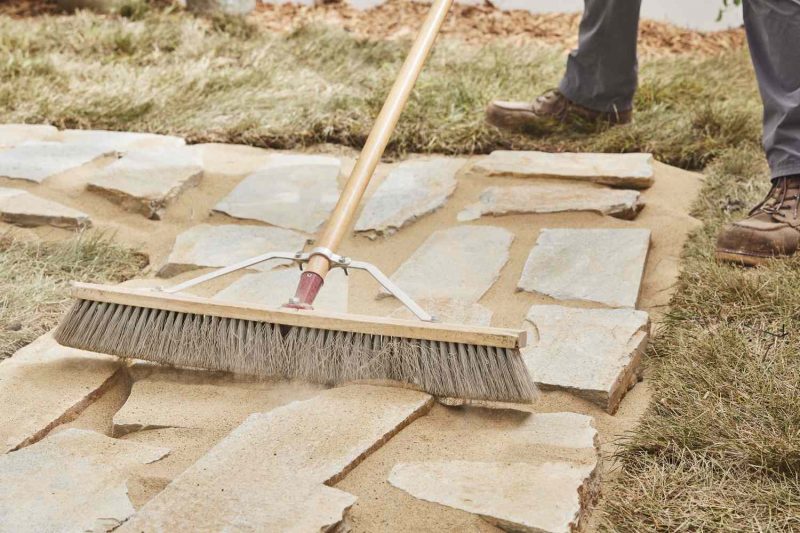
To fill the spaces between the stones, you can add sand or gravel according to your preference. Use a broom to distribute the sand, then mist the walkway with water to help the sand settle. Repeat the process of filling the gaps until they are completely filled. If you plan to plant along the walkway, use a potting soil mix to fill the gaps, and then introduce stepable plants like wooly thyme, sedum, or bugleweed.
Tips for Stone Pathways
- If the location you’re interested in is susceptible to flooding during intense rainfall, you might want to incorporate a 4 to 6-inch layer of compactable gravel beneath the landscaping fabric and sand layer. Gravel offers a more solid foundation compared to soil and facilitates drainage, which helps to avoid water accumulation.
- Consider elevating the path’s height by several inches above the adjacent terrain to aid in maintaining a drier surface.
- When utilizing large stones that could retain water, angle them towards one side of the pathway to ensure that water drains off their surfaces. It’s important to direct the slope away from the house or any nearby structures.
- If you wish, you can establish a gradient across the entire sand bed, but it’s generally more straightforward to angle each stone individually as you progress, utilizing a level for accuracy. The recommended slope is approximately 1/8 inch for every foot. For instance, for a stone that is 2 feet wide, one side should be 1/4 inch lower than the opposite side.
Is it possible to place stones directly onto the ground?
Although it may appear that simply placing stones on the ground is a straightforward and fast approach, it is essential to create a suitable base for the stones prior to installation. Aim for a depth of approximately 5 inches, ensuring the surface is leveled and even.
What distance should you maintain between your stones?
The distance between stones is largely determined by your personal stride length. Therefore, it’s crucial to arrange the stones in advance to visualize and experience the appearance and feel of your path before the installation process.
Is it possible to place stones over grass?
It is possible to place stones directly on grass, although this may not provide the best stability. For improved stability, it is advisable to remove the grass beforehand and to set the stones in a prepared base as described earlier. If a grassy appearance between the stones is preferred, grass can be planted after the stones are in place.

